
The Default "Keep in Touch" Signal
Created by a team with 40+ years of real estate experience, the “Keep in Touch” Signal is designed to keep you connected with your Sphere of Influence by sending randomized, high-converting personal touches like birthday wishes 🎉, home anniversaries 🏡, and property updates 📈—helping you stay top-of-mind effortlessly.
To get started with Blutext right after importing your Contacts into Spheres, we’ve included the ready-to-use “Keep in Touch” Signal.
It comes with default Message Collection Templates for:
Greeting (Introduction & Contact Update)
Date-Specific (Birthday Wishes & Home Anniversary,)
Recurring (Nearby Sales & Fallback messages—so you can start connecting immediately. ✅
Note: Fallback Messages are sent to Contacts not matched to any other Message Template Collection. If no template qualifies, the contact will be skipped. ⚠️
How to Set Up the Keep in Touch Signal
Step 1 Access the Signal
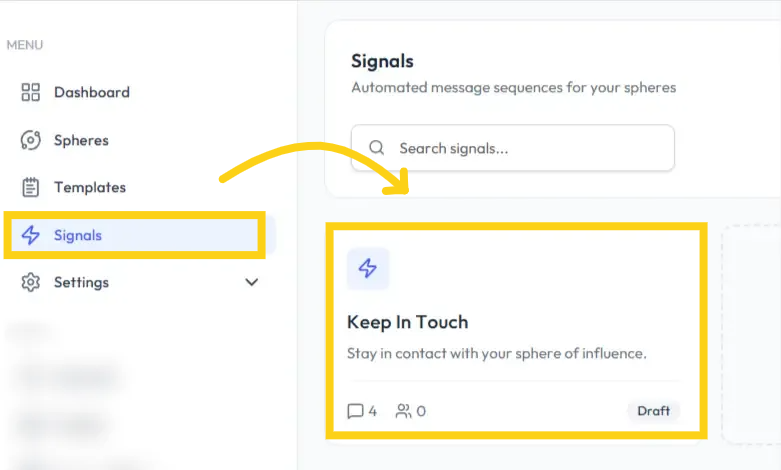
Head over to "Signals" on the left sidebar and click on the "Keep in Touch" tile 👈
Here’s what you’ll notice right away:
💬 A message icon showing 4 — meaning there are four Template Message collections linked to this Signal
👥 A people icon showing 0 — no Spheres with Contacts are connected yet
📝 A draft status — this Signal isn’t live or actively in use (yet!)
In short: everything’s set up and ready, but it hasn’t been activated or connected to any audience just yet 🚀
Step 2 Signal Overview
At the top of the page, you’ll see an overview of your Signal 👀
On the left side:
📌 The Signal name
📊 Key statistics
📝 The current status (Draft or Active)
On the right side:
🔗 The Share tool — easily share the Signal with other Blutext users
🚀 The Activate button — make your Signal live
🗑️ The Delete option — remove the Signal if needed
Everything you need to manage and control your Signal is right at your fingertips! ✅

Step 3 Capacity
This section shows your daily throughput and contact coverage — giving you a clear picture of how far your Signal can reach each day 📈
These numbers aren’t fixed just yet 👇
They’re automatically calculated based on the size of the Sphere you’ll connect in the next step 🔗
👉 In short: once you connect a Sphere, this section updates to reflect your true sending power and audience reach 💥

Step 4 Spheres
To connect your audience, follow these steps 👇
➕ Click the “Add a Sphere” prompt in the center of the field or the “+ Add Sphere” button at the bottom left
📋 Select the Sphere(s) you want to connect to the “Keep in Touch” Signal
🔵 Click the blue “Add Spheres” button to confirm
✨ Once added, the page will refresh to show your connected Sphere, and the Capacity section will automatically update with the new data
📊 Example:
With a Sphere connected, the Capacity might show:
💬 ~1 message per day
👥 Across 6 contacts
📅 On a 30-day frequency
✅ Just like that, your Signal is now aligned with your audience and ready to scale!
Step 5 Greeting
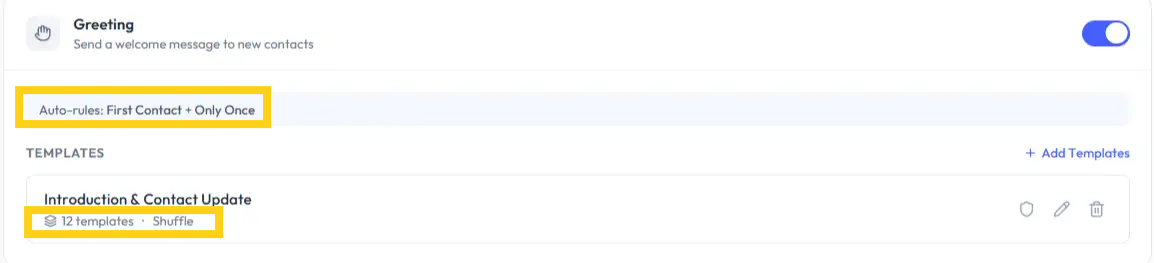
The Greeting section is toggled ON by default — so you’re ready to make a great first impression right away ✨
⚙️ Auto-rules:
Set to “First Contact + Only Once”, meaning each Contact will receive a Greeting message just one time — no repeats, no spam 👍
🔀 Templates in Action:
There are 12 Greeting Template Collections, and they’ll be sent using a shuffle method — keeping messages fresh, varied, and more natural 💬
✅ Simple, smart, and designed to feel personal from the very first touch!
Step 6 Shield, Edit, Delete Icons
On the right side of each Template Collection name, you’ll see three icons:
🛡️ Shield – Protects the collection from accidental changes
✏️ Pencil – Edit the collection to tweak or update messages
🗑️ Trashcan – Delete the collection permanently
⚠️ Note: Any edits or deletions cannot be recovered by Support, so make sure before making changes!
🔀 Example: The Intro & Contact Update Template Collection has 12 templates, which are sent at random to keep interactions varied and engaging 💬

🛡 Shield
Click the Shield to set a fallback message. This message will send if none of the connected Message Templates qualify for a send.
✏️ Pencil
Click the Pencil to review and edit the connected Message Collection Templates. Any changes here update the template for all Signals that use it.
🗑 Trashcan
Click the Trashcan to remove a Message Collection. Confirm by clicking the red “Remove” button.
Step 7 Date Specific
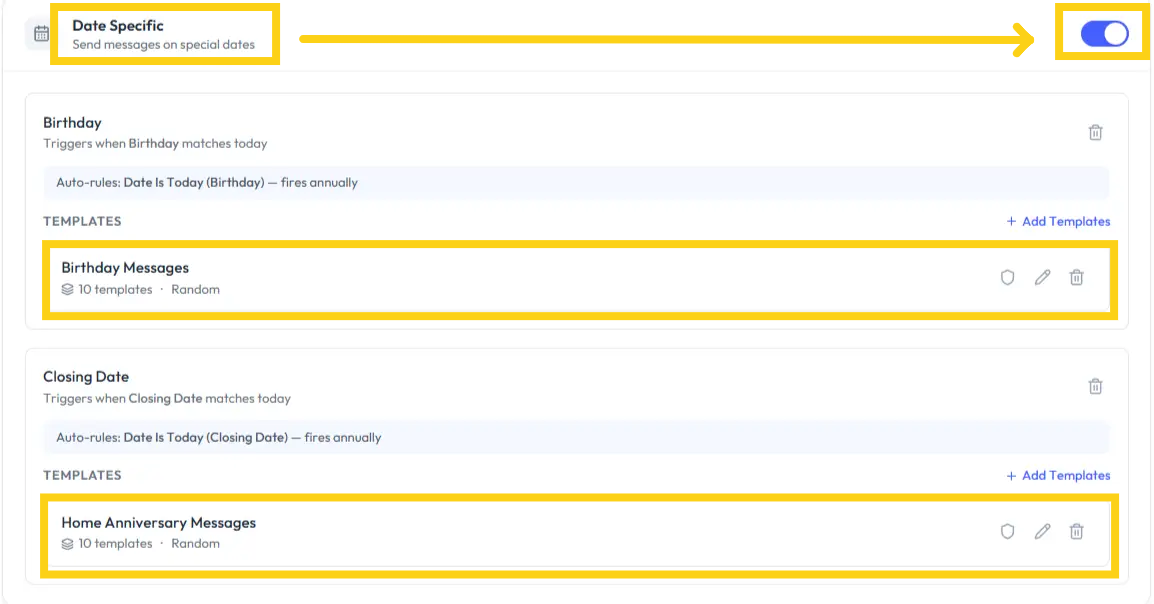
This section is toggled ON by default with Auto-rules set for special occasions:
📅 Birthday: “Date Is Today (Birthday)” — fires annually
🏡 Closing Date: “Date Is Today (Closing Date)” — also fires annually
✅ This means each Contact will receive a Greeting only once per year on their specific date — keeping it personal and timely!
🔀 Templates in Action:
Both the Birthday and Closing Date Template Collections have 10 templates each, which are sent at random to keep messages fresh and engaging 💌
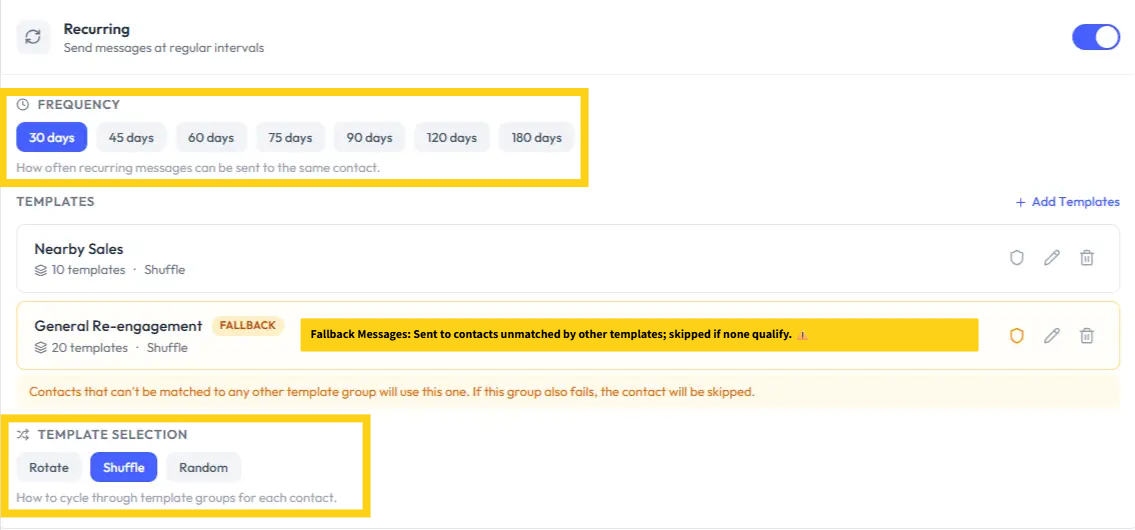
Step 8 Recurring
Here’s what you can do in this section:
⏱️ Set the frequency of Recurring messages — decide how often contacts hear from you
📂 Choose your Message Template Collections — for example: Nearby Sales and General Re-Engagement
🎲 Select the Template Selection method — Random, Shuffle, or Rotate, which determines how templates cycle through each contact
📊 Template Details:
Nearby Sales: 10 templates
General Re-Engagement: 20 templates
This setup keeps your recurring messages dynamic, personalized, and perfectly timed!
⚠️Note: Fallback Messages are sent to contacts unmatched by other templates; skipped if none qualify.
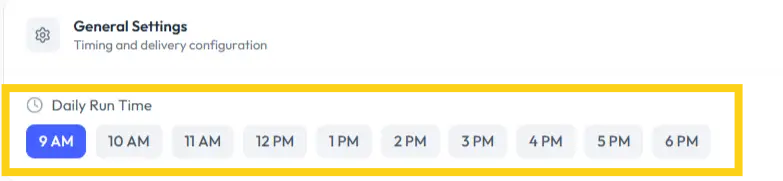
Step 9 General Settings
This is where you control the timing and delivery of your Signal ⏰
🕒 Key Feature: All messages are sent starting at the selected time in each recipient’s time zone, so your contacts always get messages at the right moment — no matter where they are 🌍
It’s the hub for making sure your Signal is timely, consistent, and perfectly scheduled!
Step 10 Activate the Signal
1️⃣ Scroll to the top right of the Signal page
2️⃣ Click the white “Activate” button
✅ Once activated:
The status next to your Signal name will update to “Active”
The button will change to “Pause”, so you can temporarily stop the Signal whenever you need
Now your Signal is live and ready to engage your contacts! 🎯

How to Share a Signal
1️⃣ Click the “Share” button at the top right of the Signal
2️⃣ Toggle to enable sharing
3️⃣ Choose the permission level:
Edit: Others can make changes
Read-only: Others can view but not edit
4️⃣ Click “Copy” to grab the unique link and share it with other Blutext users
5️⃣ Finish by clicking the blue “Done” button to close the pop-up ✅
⚠️Note: When sharing a Signal, you are allowing another user to make a copy of the shared Signal. While you can turn sharing on or off, once shared, access cannot be revoked.
Need help? Contact us at support@blutext.com or chat with us at the bottom right of our blutext.com website or knowledge base.