
📱High Level Workflows & Blutext
This article will guide you in creating the "easy-button" High Level Workflows using Blutext webhook integrations. You will learn to quickly set up a High Level Webhook for the Blutext messages you want to send, add it to High Level Workflows, track your created Webhooks, and customize them on the fly.
Important Details
High Level DNC
When creating a webhook in the High Level template with the Blutext ID and message content on our Integration page, the DNC option is disabled by default.
High Level Webhooks
A Webhook (also called a web callback or HTTP push API) is a way for an app to provide data to other applications API URL triggered by, events. Click here to learn more about how High Level Workflows use Webhooks.
High Level Merge Fields
You can add High Level Merge Fields to the Blutext High Level Webhooks that you create on our Integrations page.
*Note: If the Merge Fields added to the text lack matching data on the Contact in High Level, it may result in extra spacing or text lacking context.
Example:
If you create a text like \"Hi {{contact.first_name}} {{contact.company_name}} just checking in on ....\" and the Contact Profile lacks a company name, it will display as \"Hi Annalisa with just checking in on...\" resulting in two spaces between \"with\" and \"just\" due to the missing Company Name data.
How to Create a High Level Webhook for Blutext
This article will walk you through how to create a High Level Webhook for Blutext.
*Note: When creating a Webhook on the Blutext Integration page, refresh the page after each new creation.
Step 1
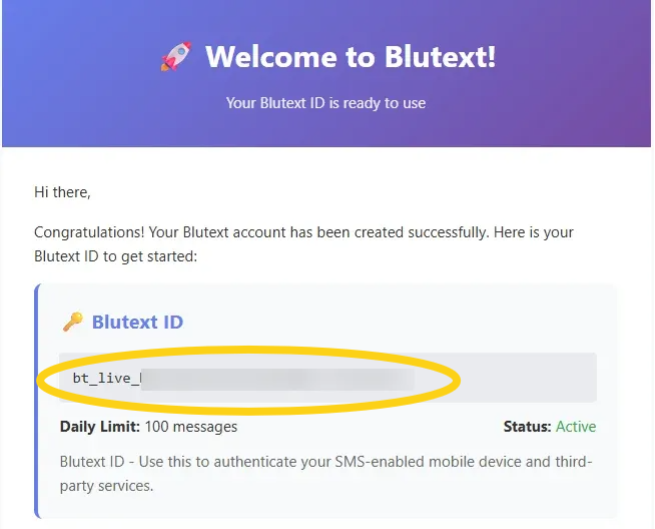
Go to your email, and locate the "Welcome to Blutext" email that we sent, open it, and copy the Blutext ID within.
Step 2
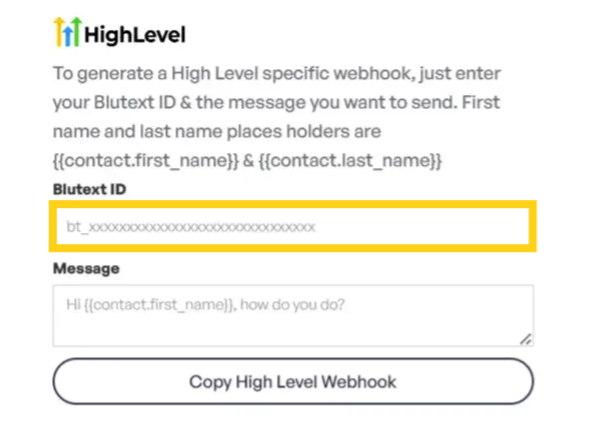
Click here, then within the High Level field, enter the Blutext ID you were sent in the "Welcome to Blutext" email.
*Note: Search Your Email for the "Welcome to Blutext" Message to Find Your Blutext ID.
Step 3
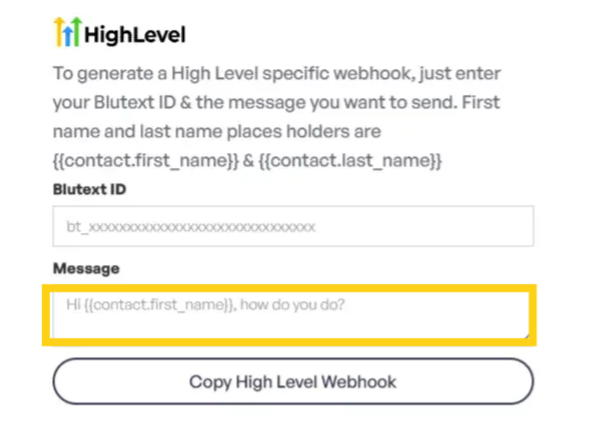
In the message line, enter the content of the text message you wish to send in the High Level Workflow you are creating or to which you are adding this Webhook.
Remember, this is a text to serve as a conversation starter. Keep it short and sweet. Do not add links.
Step 4
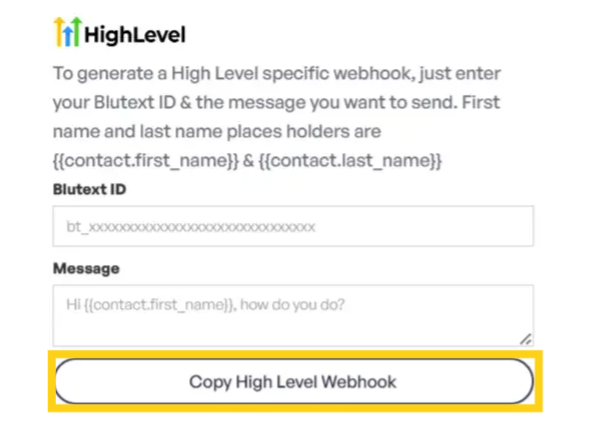
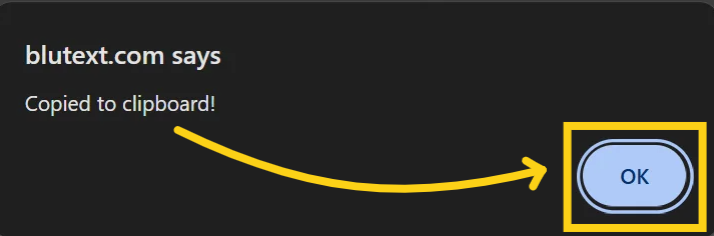
Hover over, and click the "Copy High Level Webhook" button then click "OK."
*Note: Do not close this tab until you have saved the Webhook link in a Google Sheet or Excel file, or proceeded to create the Webhook Trigger in High Level. If you DO close the tab prior to saving or creating the Webhook trigger you'll need to create it again.
Note: Click here to learn more about High Level Merge Fields.
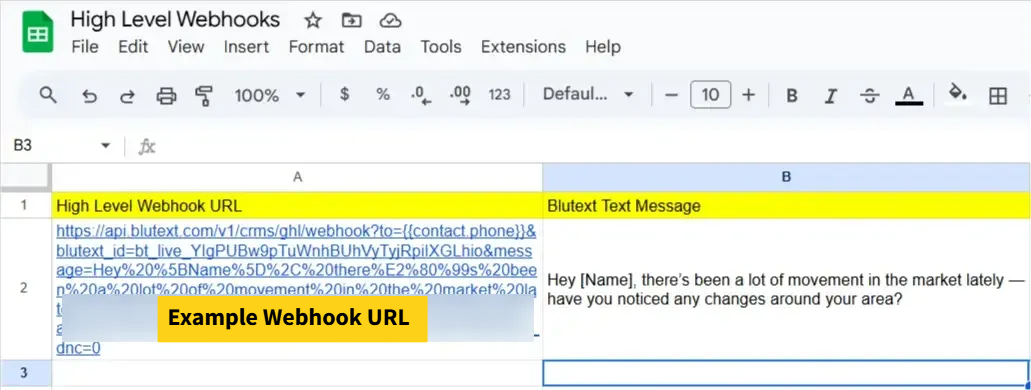
How to Track Created High Level Webhooks for Blutext
To save High Level Webhooks for Blutext, create a Google Sheet or Excel file with columns for the Webhook link and message details. This will help you track created Webhooks and easily copy the link for use in a High Level Workflow.
Example of how to track High Level Webhooks.
How to Create a High Level Workflow with Blutext Webhooks
This section explains how to set up Blutext in a High Level Workflow Trigger within an Automation sequence.
Click here to learn more about High Level Workflows.
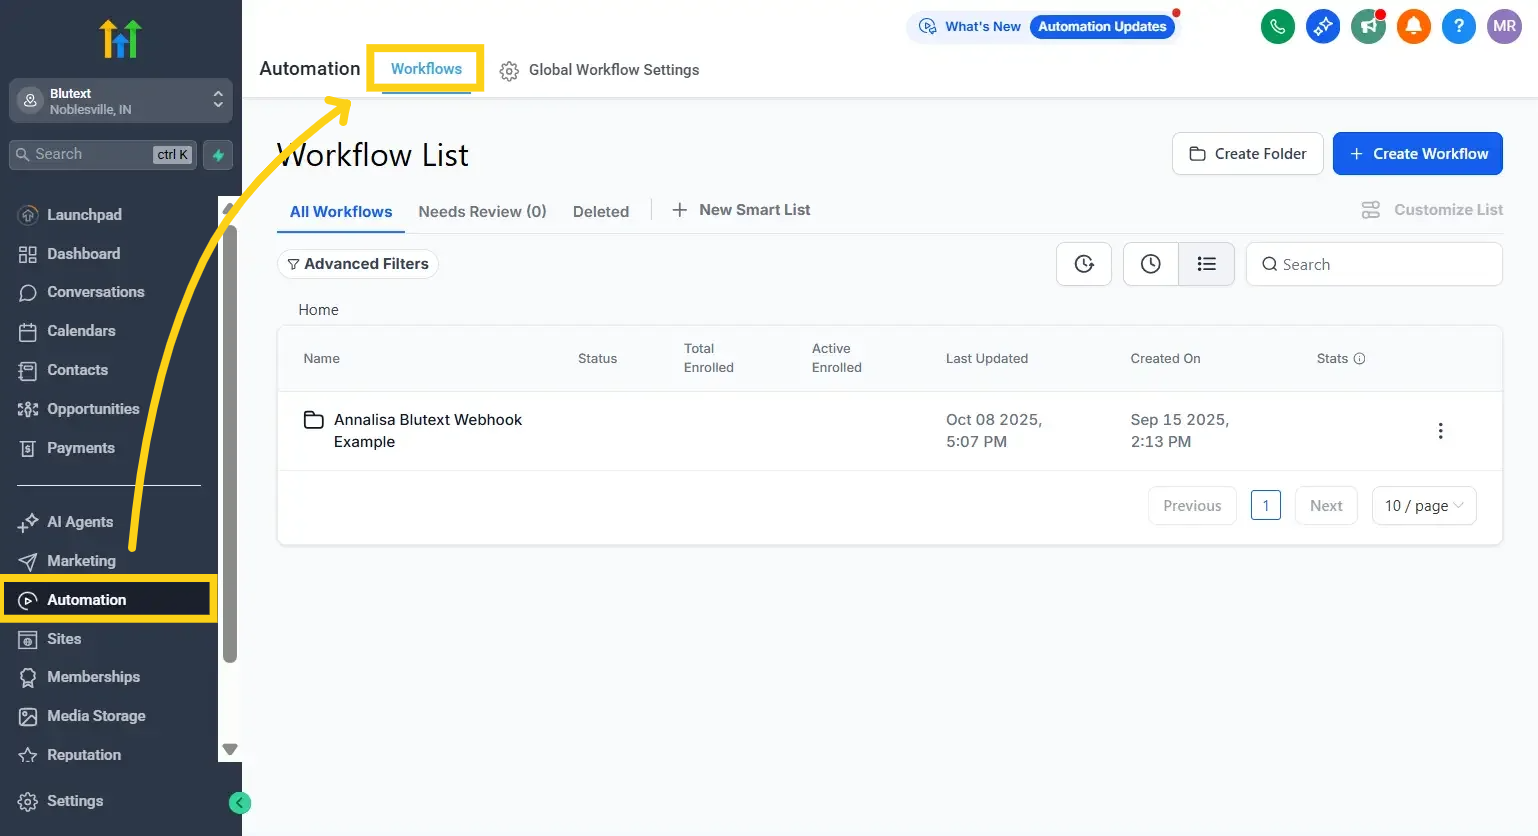
Step 1
Log in to your High Level account, navigate to Automation Workflows, and open an existing Workflow or create a new one.
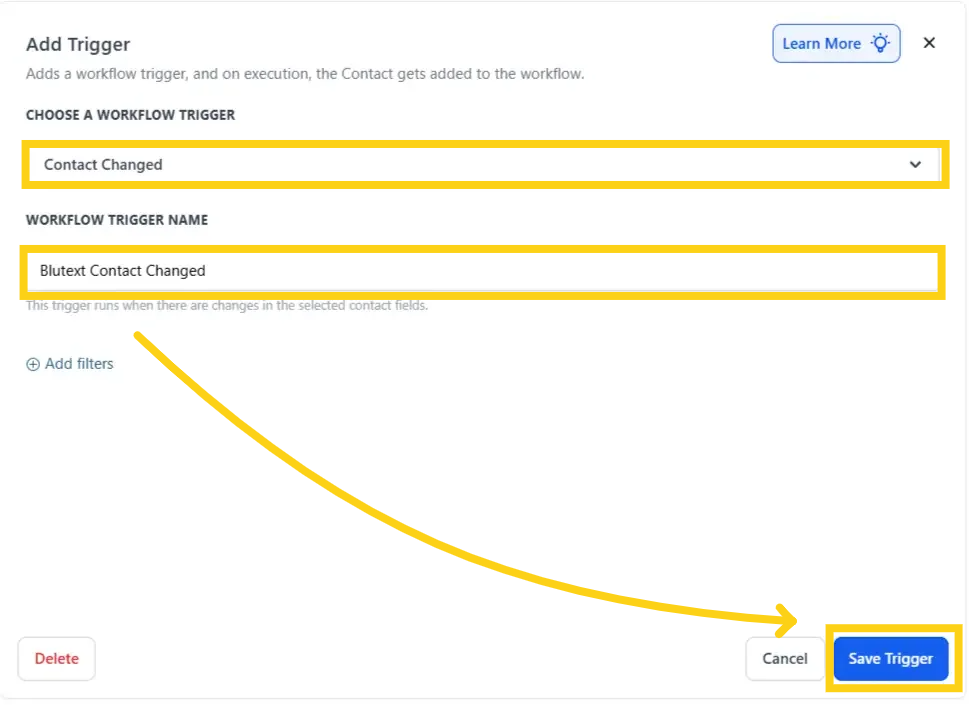
Step 2
Create the workflow trigger to define the scenario for this Workflow. After you have completed that action, you will define what action will take place next.
In this example, I selected the trigger to be when the "Contact Changed."
*Note: Don't forget to click "Save Trigger" at the bottom right of the Workflow Trigger you created.
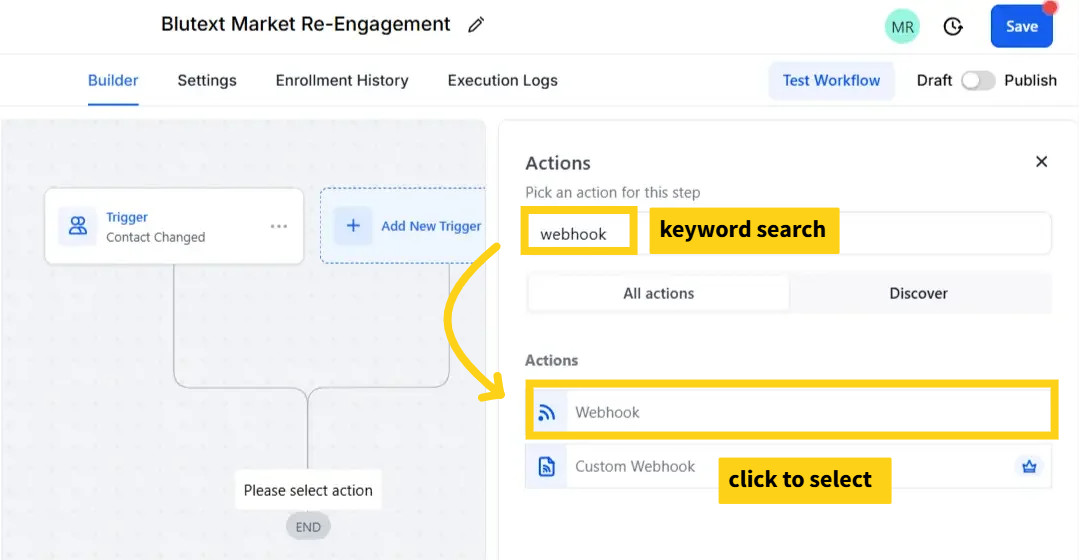
Step 3
Click the blue "plus sign" icon below the trigger you created, then keyword search "webhook" in the field at the top right, and click the Action "Webhook" to select it.
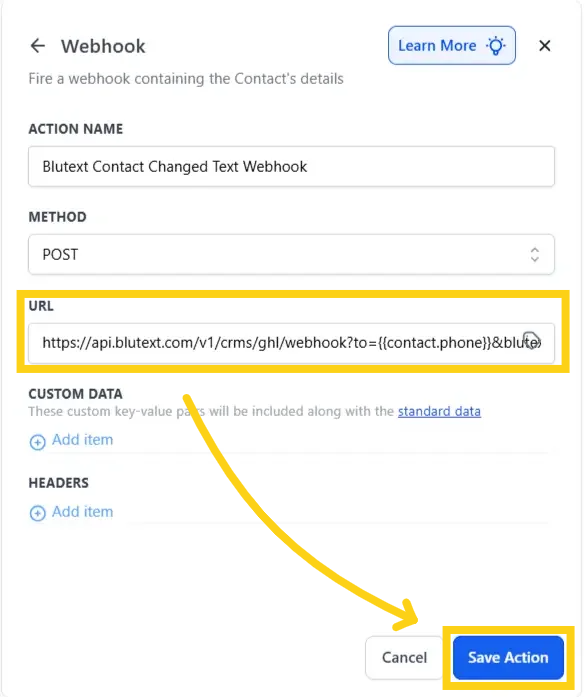
Step 4
Create the Webhook "Action Name," leave the Method to "Post," paste the Webhook link into the URL field, and click the blue "Save Action" button.
Step 5
Continue creating your Workflow, click the toggle to "Publish" (to the right) and click the blue "Save" button at the top right of the page when complete. Once saved and published, you can assign it to a Contact in Automations.
